What you'll need:
A t-shirt that fits you well (to use as a template)
ball point sewing needle
matching thread
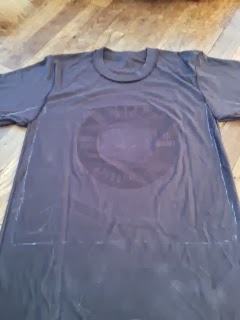
My son is in love with this local restaurant/shop, Station 66, (as am I) and has been bugging us for a t-shirt from there for a while. His birthday is saturday and I wanted to get him one as a gift, but alas their shirts are only in adult sizes. Very basic sewing skills to the rescue! I bought an adult small and am using a shirt of his (size 6) that I know works well.
Step 1:
Turn your huge shirt inside out and lay it on a flat surface being careful to smooth out all the wrinkles and line up all the seams
Step 2:
Take the shirt that fits you well and lay it on top of the t-shirt you want to change. Make sure the shoulders are lined up and everything is smooth (really take your time on this step you don't want to accidentally alter your shirt crooked) Pin through all the layers in a few places to keep it from slipping.
Step 3:
Trace around the sides and up along the bottom of the sleeve of your well fitting shirt. As you trace along the bottom of the sleeve extend your chalk line to the edge of your shirt. If your going to want to hem your new shirt be sure to leave an inch or so beyond the bottom of the well fitting shirt to fold in. Don't trace around the top of your shirt this will be left alone (In other words we won't be altering the original shoulders or necklines).
Step 4:
Carefully remove the well fitting top shirt. Your working with knit fabric here so remember to change you sewing machine needle to a ball point needle. No Sew right along the lines you've marked, straight up the side. Pivoting at the armpit and continuing where you marked the bottom of the sleeve. Do the same thing on the other side.
 |
| here you can see the new lines. |
 |
| I'm sewing right on the chalk lines |
Step 5:
Cut away the access fabric along your new seams (I like to leave about 1/4 to 1/5 inch of fabric. Knit doesn't unravel so don't worry about the raw edges. Cut the sleeve back to your desired length (you can hem the sleeve but I find it's a bit tricky with the knit and since it won't unravel I simply make sure it's a nice clean cut and leave it at that.)
Step 6:
Go back and reinforce the stitching in the underarm.
Step 7:
Cut the shirt to it's desired length. If you want to hem the bottom now's the time. Turn in the raw edge about one inch, iron and sew a new hem. I like to sew two lines of stitching along the hem; the first 1/4 inch from the fold and the second 1/4 inch away from the first row of stitching. I find this gives it a pretty professional look.
Here's the finished Station 66 shirt next to a regular t-shirt of his. I think it looks pretty good. And, usually when your doing this kind of alteration it won't be as extreme of a size shift so it'll look even better.
If you have any questions leave them in the comments. I read every comment we get. So if there is any step that your unsure about ask away. Also don't forget to check out our first "Sewing Room Tour" and we're pinning away like mad on Pinterest.
Now go and take that shapeless sports shirt and give it some girly shape!
Happy Sewing
Love, Jessie.


No comments:
Post a Comment